Amazon Redshift
Creating an Amazon Redshift Connector
One of the ways we can establish a read connection is through Amazon Redshift. In this tutorial, we'll walk through the process of creating a read connector for use with your Redshift cluster(s).
Prerequisites
- A Redshift cluster
- A username and password with access to the cluster
- Connectivity through IP whitelisting or a bastion host (please contact [email protected] for support)
Create New AWS Redshift Connection
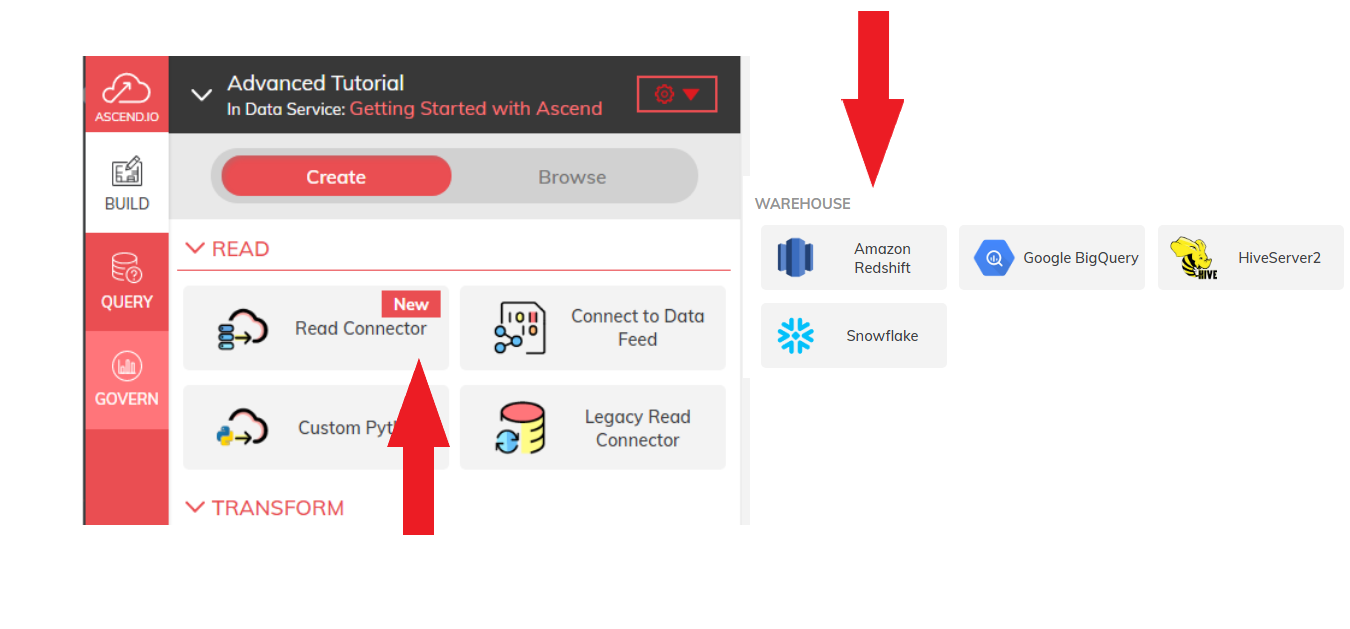
After selecting a dataset, go to the BUILD tab and click on "Read Connector". From there, under the "Add New Connection column, select "Amazon Redshift" from the WAREHOUSE category. This set of steps is illustrated below in Figure 1.

Figure 1
Create a New Read Connection
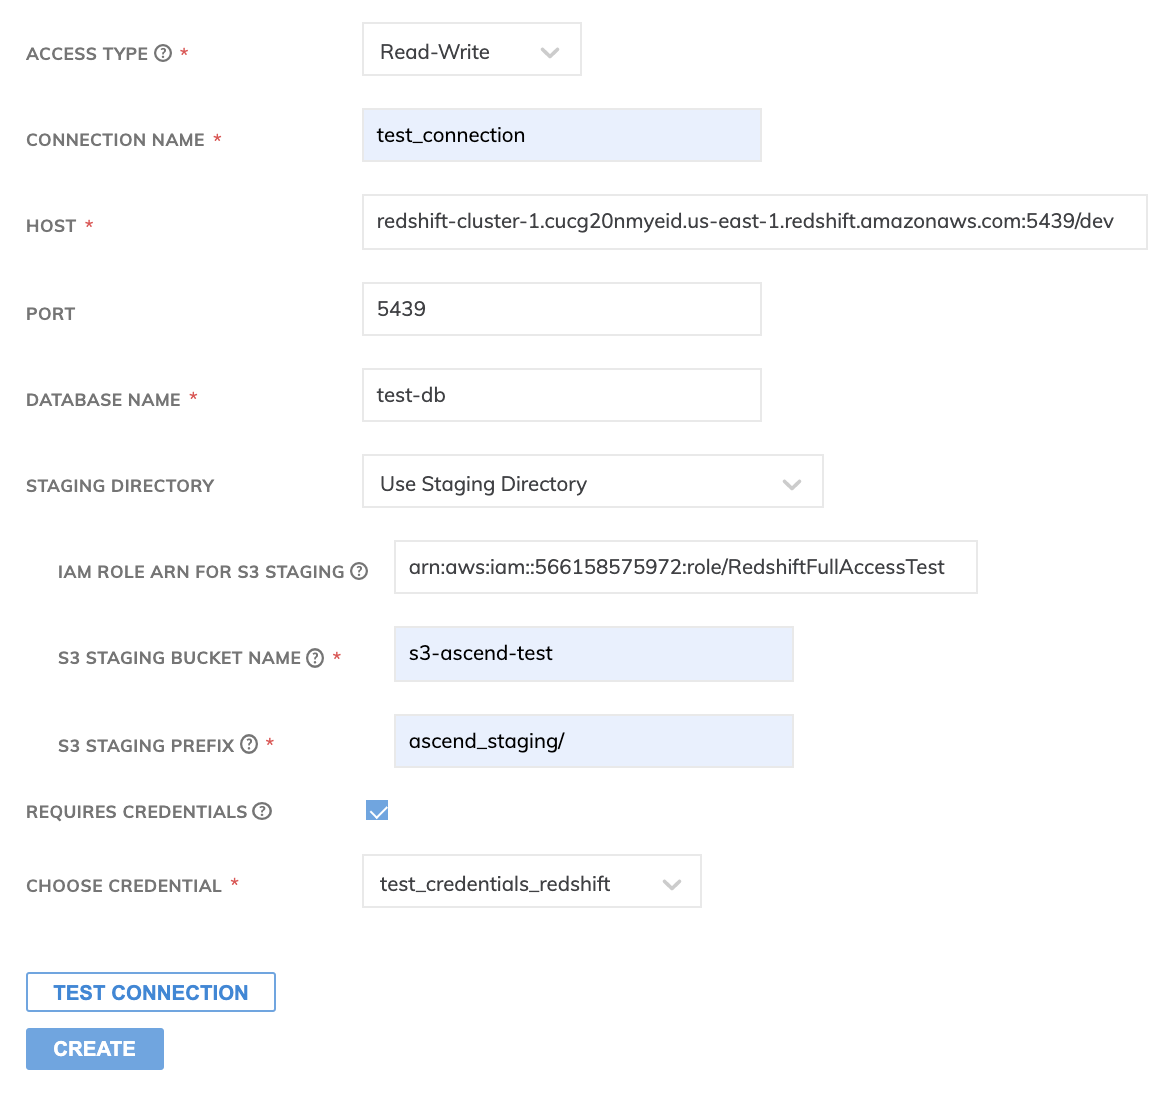
At this screen, complete all required fields (such fields are marked with a red asterisk).

Figure 2
Each field is used to identify parts of the connection, and are defined below:
- CONNECTION NAME: a name to identify the connection. (It should be in the following format: clustername.abc123xyz789.exampleserver.redshift.amazonaws.com).
- HOST: the endpoint of the Amazon Redshift cluster that the read connector will be linked to.
- PORT: the port number that the read connector uses. By default, Ascend.io uses 5439.
- DATABASE NAME: the name of the database that you want to access.
- STAGING DIRECTORY: The staging directory is an option on Redshift but is HIGHLY recommended for better performance as even a couple hundred records inserted to Redshift without the 'COPY' command can make the Redshift cluster busy. Also, for the Reading side, the staging directory allows for using the 'unload' command to first export the records to the blob store and then read in the records from there.
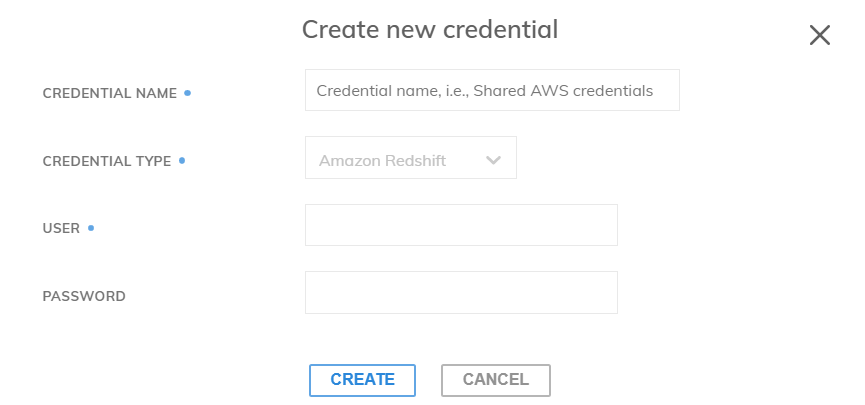
If necessary, check the box for REQUIRES CREDENTIALS to choose an existing credential. If none exist, create a new credential. All required fields are marked with a blue dot.
All Redshift connections use the official Amazon Redshift driver and are SSL encrypted.

Figure 3
Each field is used to identify parts of the credential, and are defined below:
- CREDENTIAL NAME: the name of your new credential.
- CREDENTIAL TYPE: the type of credential created. This field will already be preselected based on the read connector type chosen at the start.
- USER: the Redshift username of the user gaining access with this credential.
- PASSWORD: the Redshift password that the user may need for accessing AWS.
Once the credential has been created and/or selected, choose TEST CONNECTION to verify that the host can be accessed, and then click CREATE AND USE CONNECTION to create the read connection.
Once the read connection is established, you will then need to create a new read connector. A NAME is required to identify the read connector, and an optional DESCRIPTION can also be entered to describe the purpose of the read connector.
Updated 7 months ago