Groups
Grouping is a good practice toward improving readability by combining dataflows' components into one logical component container or group.
InformationGrouping Components does not affect the Dataflow run in any way. It is just a UI concept.
Manage Groups
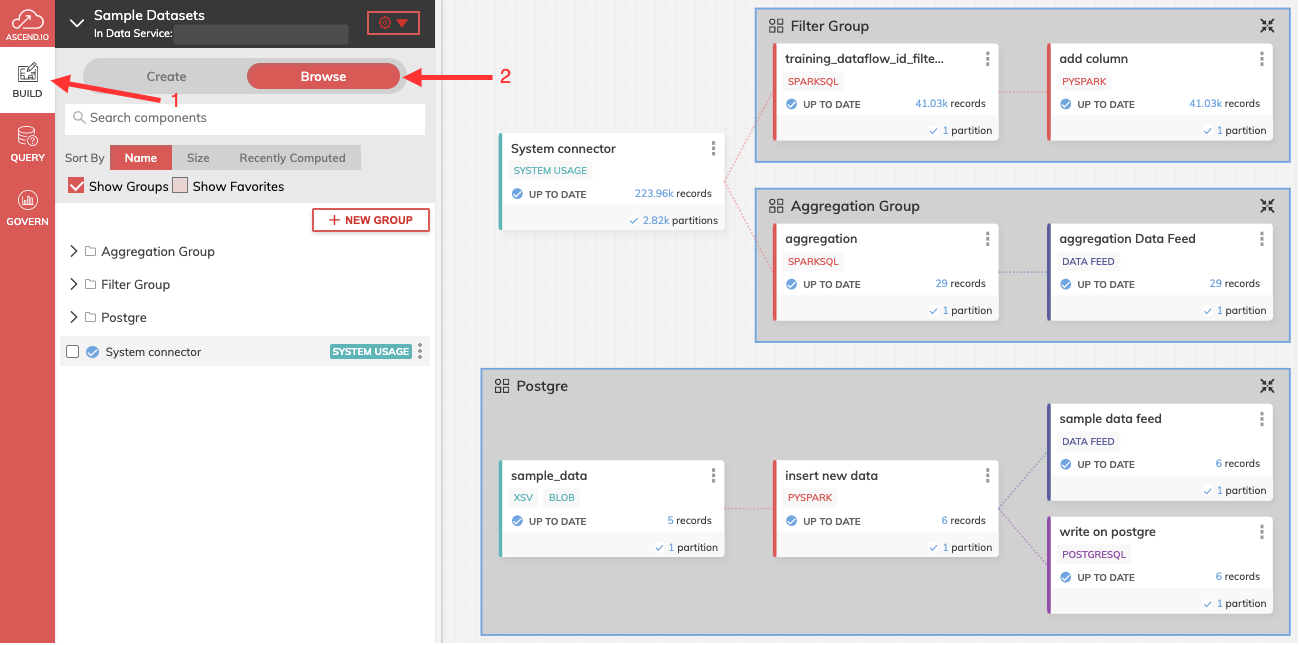
Figure 1
Figure 1 shows how to reach the summary panel of the groups in the current Dataflow. Make sure that the Show Groups checkbox is selected in the Browse panel as described in Figure 2. The Action panel is used to manage, view and create new groups. Which are represented as folders that contain all the components that are part of it. In particular you can:
- Add element to a group;
- Create a new group;
- Expanding/shrinking a group from the working panel;
- Edit or Delete a group.
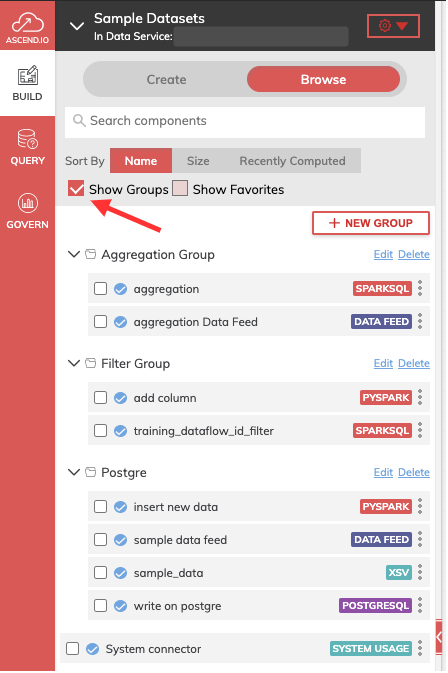
Figure 2
InformationThe Dataflow layout may get reshaped once a group is created.
InformationAny Grouping is preserved when using the Import / Export functionality.
Add element to a Group
To add a new element to an existing group just drag and drop it into the desired folder from the Action panel.
Create a new Group
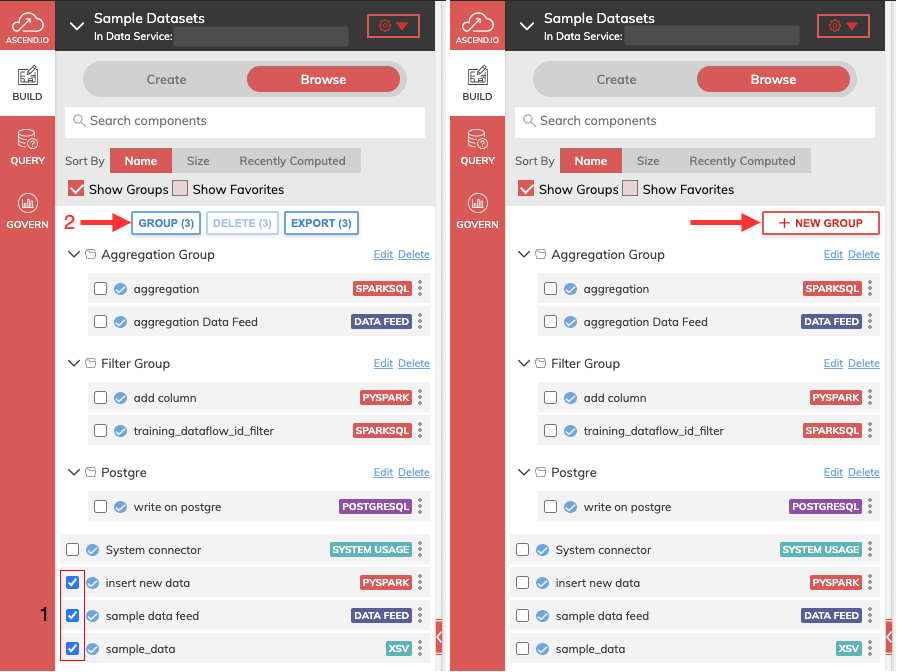
Figure 3
There are few ways to create a new Group. In Figure 3,
- from the Action bar right click on any selected component and select Groups or click New Group;
- In the Create new group form, enter a name for the group. You may add other components or remove components for the group. Hit Create.
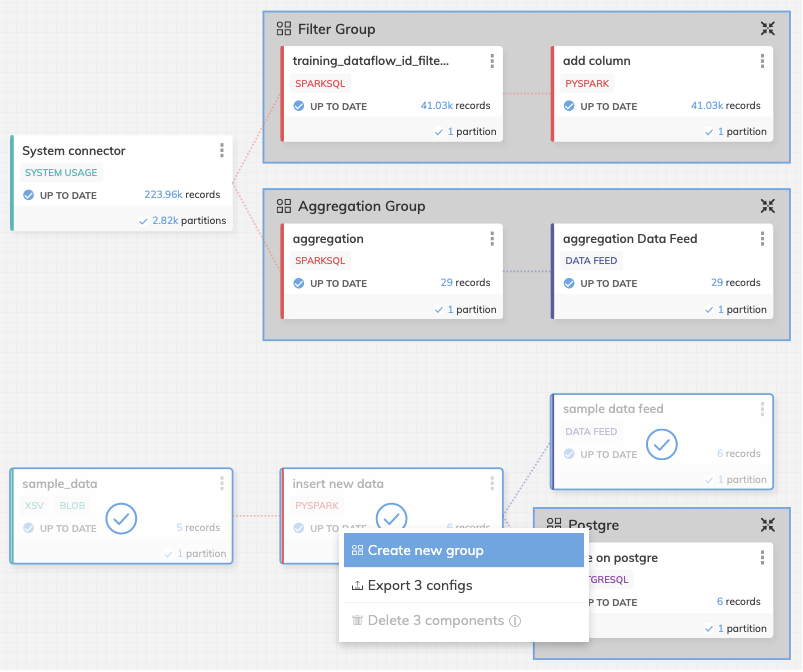
Figure 4
From the Working panel,
- select the components that you would like to group by pressing SHIFT and dragging on the Dataflow;
- Right clicking anywhere on the Dataflow will raise the custom context menu. Hit Create new group.
Expanding/Shrinking a Group
To view the component within a group, right click on the group, and click Expand 1 group/Shrink group from the working panel. Alternatively, you can click on the Expand / Shrink icon on top right corner of the group to expand / shrink it as shown in the Figure 5.
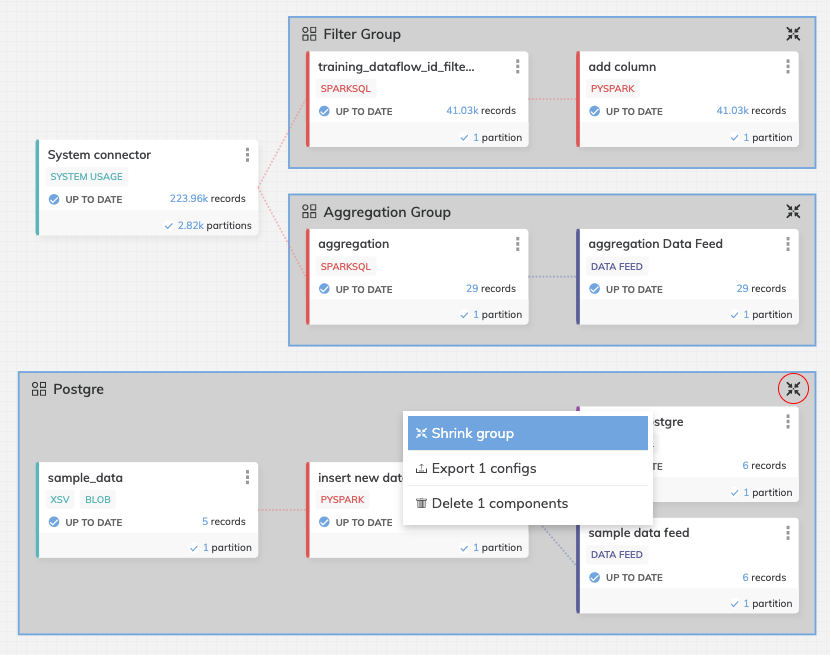
Figure 5
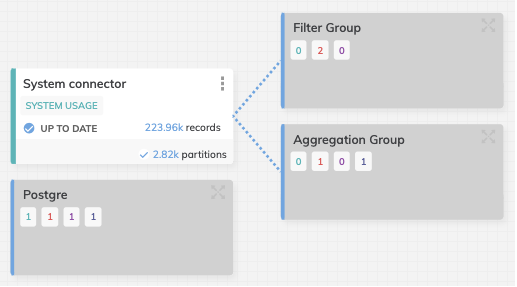
Figure 6
Once the group has been collapsed as shown in Figure 6, it displays a summary of the items within it in the following order (from left to right):
- number of Read Connectors;
- number of Transform Blocks;
- number of Write Connectors;
- number of Data Feeds.
Edit or Delete a Group
Select a group from the Action panel to rename or delete the corresponding group. (Figure 7 and 8 below). In this case deleting the group will not delete the components inside the group.
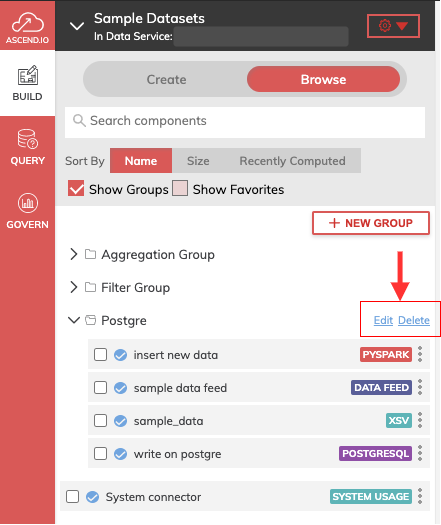
Figure 7
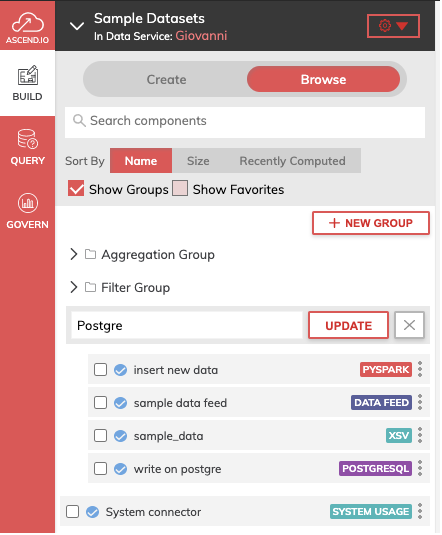
Figure 8
Delete groups and its contentOthers ways to delete a group (Figure 9):
- left clicking a container group from the Working panel and then click DELETE from the Action panel;
- right clicking any selected component and select Delete 1 components.
Doing that will delete the group only! The Component's will remain in the Dataflow.
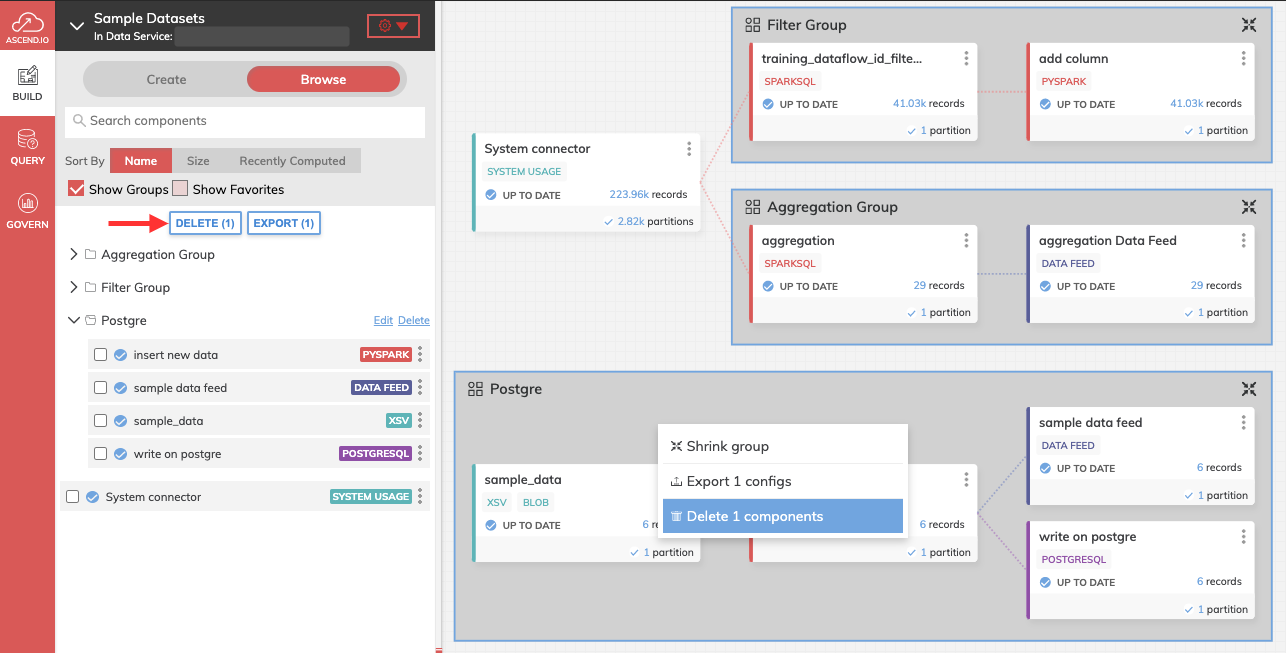
Figure 9
Updated 8 months ago