Create a Python Read Connector
Ascend's Python Read Connector streamlines data ingestion with customizable settings, schema generation, and launch capabilities that allow for easy tuning and modification.
Step 1: Create a new Read Connector.
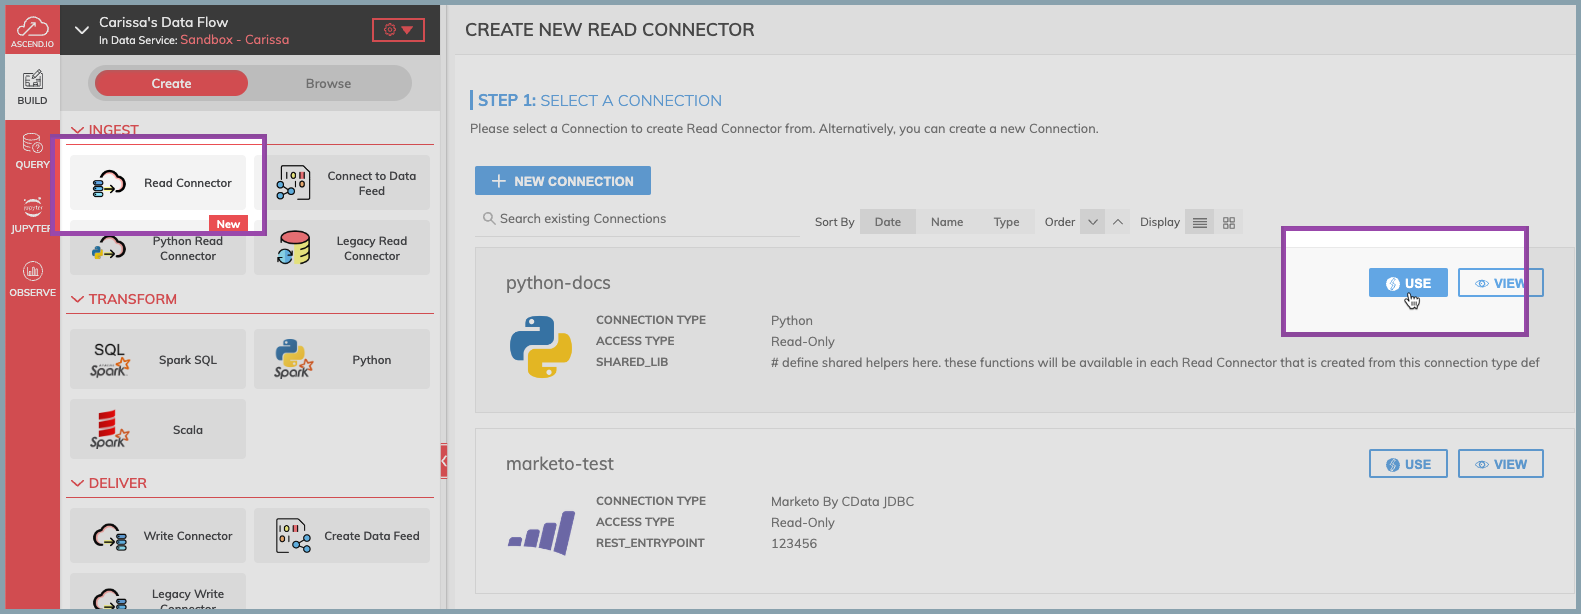
- From the Build Pane, select Read Connector.
- Select USE for the Python connection you want to use.

Figure 1.
Step 2: Select data to ingest.
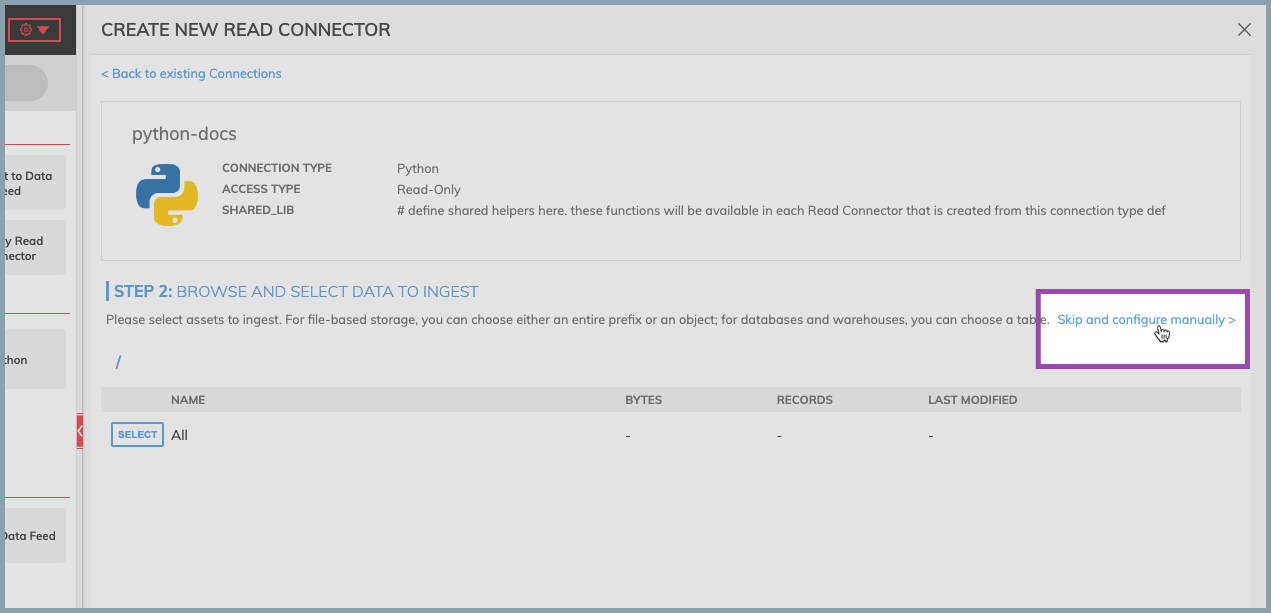
- Select "Skip and configure manually."

Figure 2.
Step 3: Configure your Read Connector.
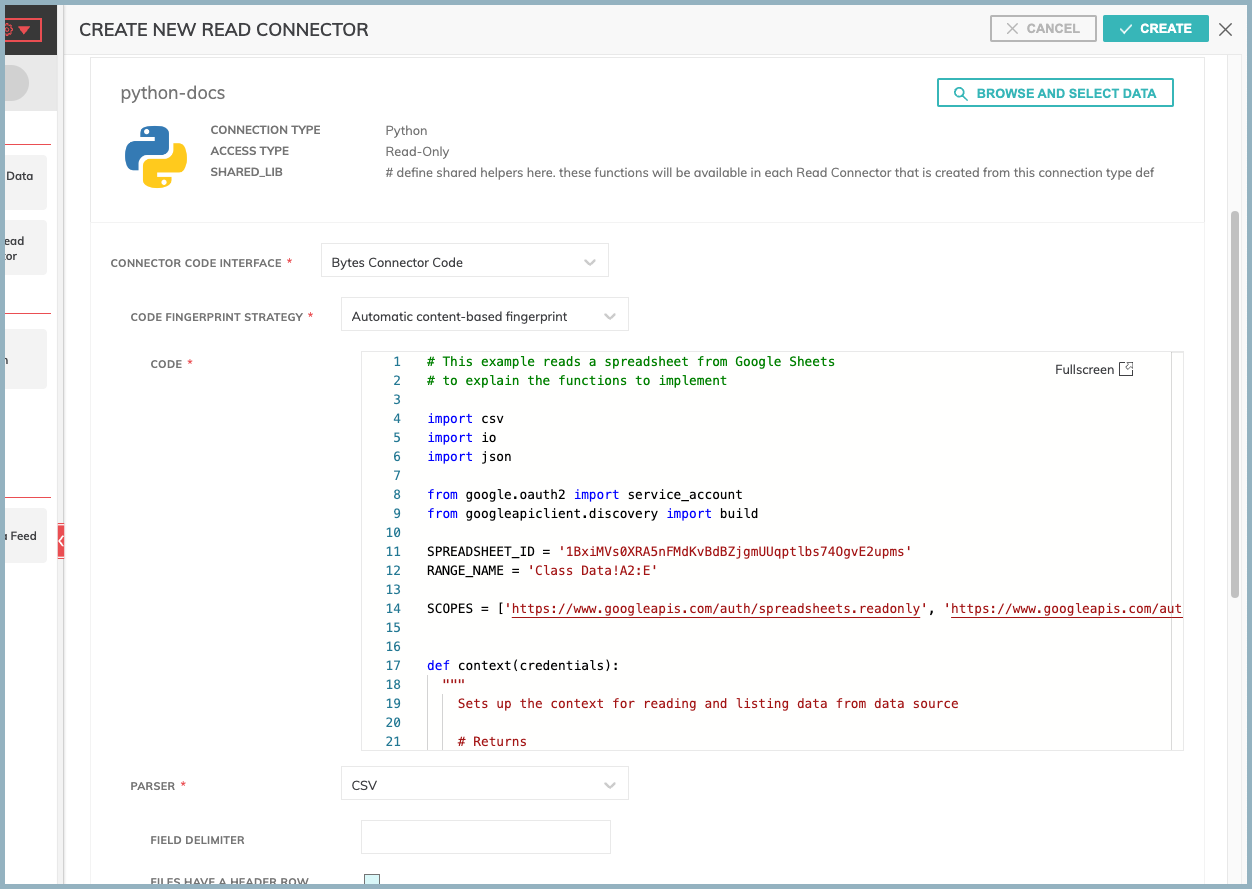
- Provide any required or optional additional configurations for the Read Connector.
- Select your preferred Connector Code Interface.
- See each interface's specifications for field descriptions and function definitions:
- From the Code Fingerprint Strategy drop-down menu, select Automatic content-based fingerprint.
- Indicate any additional PIP packages to install that are not already included with the Python Connection. PIP packages should be space delimited. Ex.
requests python-dateutil.

Figure 3. Bytes Connector Code shown with boilerplate code.
Step 4: Generate the data schema
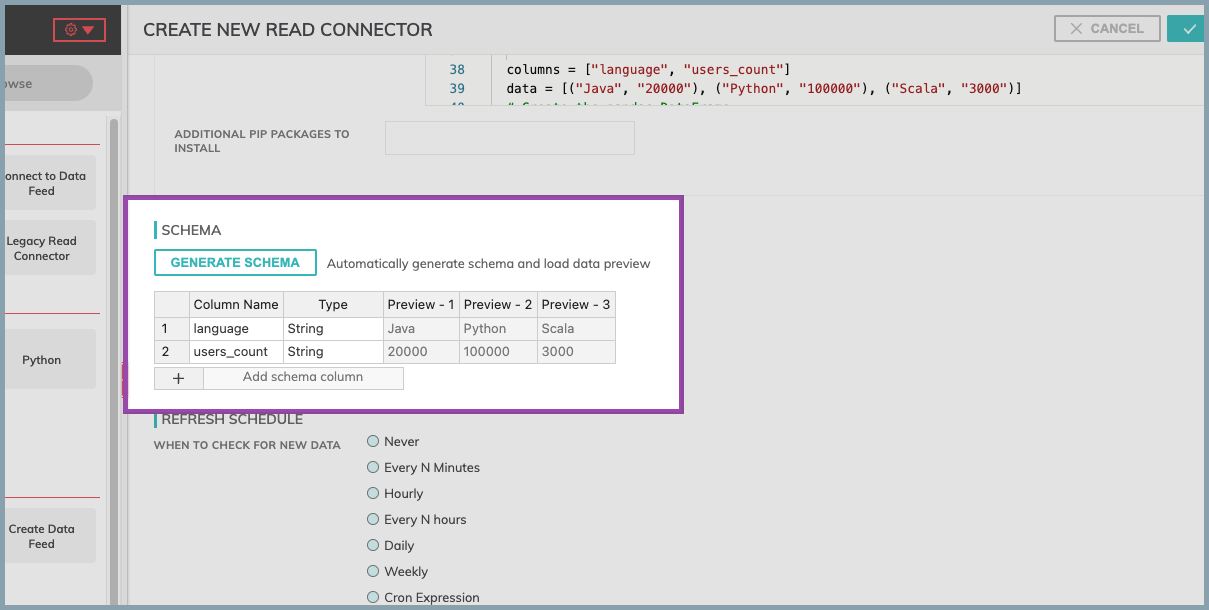
- Select GENERATE SCHEMA to create a schema and a data preview.
- Add schema column: Add a custom column to the generated schema. If manual
- If column types are incorrect, double-select each cell to change the type.
Generating Schema with Large DatasetsSelecting GENERATE SCHEMA will run the code entered into the Connector Code Interface and sample the result to provide the schema. If this code will run with a large dataset, configure the Interface using a sample dataset or manually add the schema.

FIgure 4. Schema generated using Bytes Connector Code boilerplate code.
Step 5: Launch your Read Connector.
- Select CREATE at the top of the configuration pane.
Additional Settings
Python Read Connectors have the same additional settings as standard Read Connectors. See the standard Read Connector documentation for more information.
Saving your workIf your Interface Code requires tuning and you are not ready to run your connector, you can save the work you currently have by
- providing placeholder values for required fields in Step 1 through Step 3,
- manually adding at least one schema value, and
- setting Component Pausing to paused
After setting the component to paused, select CREATE. A paused read connector connector will display on the Ascend graph. You can edit this component as needed. To run the component, set Component Pausing to Running.
Updated 8 months ago