Salesforce
Learn the required and optional properties of creating a salesforce Connection, Credential, Read Connector, and Write Connector.
Prerequisites
- Ability to create a Connected App in Salesforce
Connected Apps can be created in: Group, Professional, Enterprise, Essentials, Performance, Unlimited, and Developer Editions of Salesforce.
Create a New Connected App in Salesforce
If you already have a Connected App created for Ascend, skip to the next section, Create a New Salesforce Connection
If you have not created a Connected App in Salesforce before, take a look at Salesforce's documentation to [create a new Connected App] (https://help.salesforce.com/articleView?id=sf.connected_app_create.htm&type=5)
Make sure the follow list of configurations are present in the Ascend Connected App -
- Enable OAuth Settings
- Populate the Callback URL field with
https://login.salesforce.com/ - In the Selected OAuth Scopes field, select
- Access and manage your data (api)
- Perform requests on your behalf at any time (refresh_token, offline_access)
- Provide access to your data via the Web (web)

Figure 1
Accessing the Required Tokens
Ascend supports the following authentication types in Salesforce; Authorization Code, Refresh Token, and Password. If you are using Password authentication, skip to Create a New Salesforce Connection
Authorization Code
To obtain an Authorization Code, follow the steps outlined below -
- In Salesforce, navigate to the list of Connected Apps and select the View option for your Ascend App
- Scroll to the API (Enable OAuth Settings) section where you will find the Consumer Key and the Consumer Secret

Figure 2
- Construct the URL to obtain the Authorization Code
https://<YOUR_INSTANCE>/services/oauth2/authorize?response_type=code&client_id=<CONSUMER_KEY>&redirect_uri=https://login.salesforce.com/
Your instance can be found by clicking on the URL bar while in your Salesforce environment

Figure 3
The consumer key is copied directly from Salesforce.
Using the sample above, the request will look similar to the URL below
https://ascend-dev-ed.my.salesforce.com/services/oauth2/authorize?response_type=code&client_id=3MVG9SAMPLE_CONSUMER_KEY_TryEteq8LAvqYEnyZxDSAMPLE_KEYw0w0Mv&redirect_uri=https://login.salesforce.com/
- Copy the constructed URL from step 3, paste into a browser and click enter. Use a browser that does not have cached credentials or you will be unable to retrieve the code from the URL.
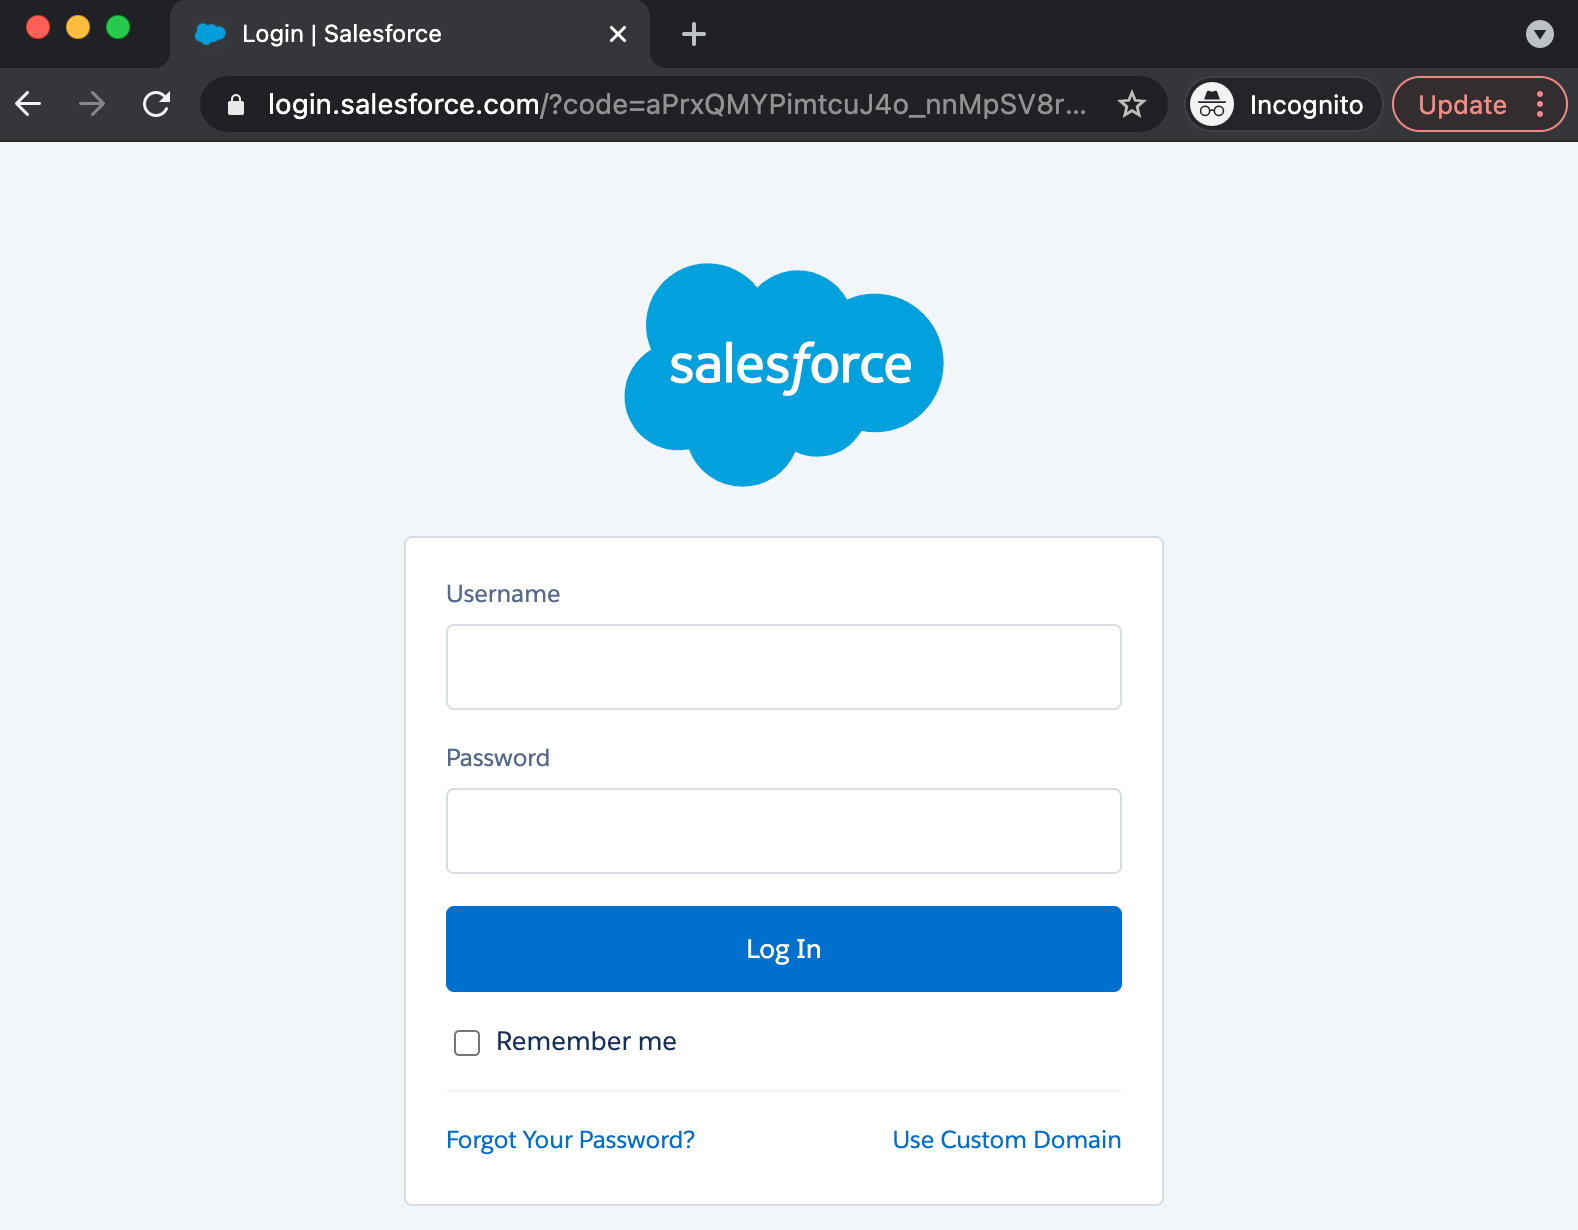
Figure 4
When you are prompted for credentials, before entering them copy the URL containing your authorization code.
Refresh Token
To obtain a Refresh Token, follow the steps outlined below -
- Open your preferred tool for making REST API calls.
- Create a POST request using
https://<YOUR_INSTANCE>/services/oauth2/tokenas the URL. Parameters to include are -
- code: authorization code
- grant_type: authorization_code
- client_id: Consumer Key from Salesforce
- client_secret: Consumer Secret from Salesforce
- redirect_uri: https://login.salesforce.com/
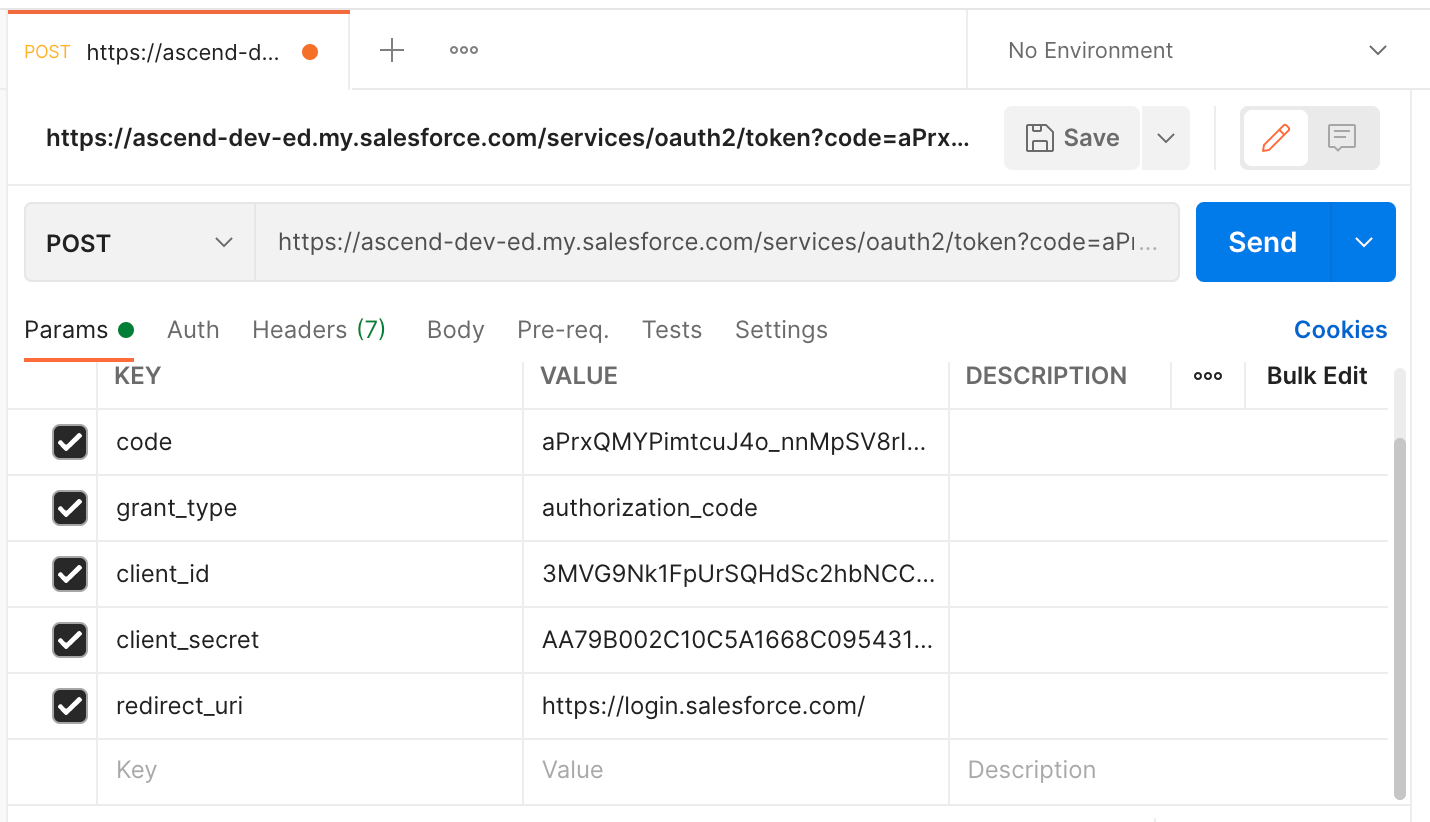
Figure 5
A successful response will include the following -
{"access_token":"00D5Y0000025gJM!ZZZZZZZZZZZZZZZZZZZZZZZZZZZZZZZZ_fZ6o7U09Yj_jSE_QxnaFVj4LEKBRhbnTvU24Asdg4ACX8nfzL9u","refresh_token":"5Aep861NT6Ju45T6F2FyZZZZZZZZZZZZZZZZZZZZZZZZ_d19HOnEzDRnbtUZHD2uwJbea.r8S3TiLn8PRjCg7lG","signature":"72tcruS5u8GWuWKZZZZZZZZZZZZZZZZc5H9HDNTI=","scope":"refresh_token web api","instance_url":"https://ascend-dev-ed.my.salesforce.com","id":"https://login.salesforce.com/id/00D5Y0000025gJMUAY/0055Y00000Gaul3QAB","token_type":"Bearer","issued_at":"1617920455808"}
- Copy the refresh token.
Create a New Salesforce Connection
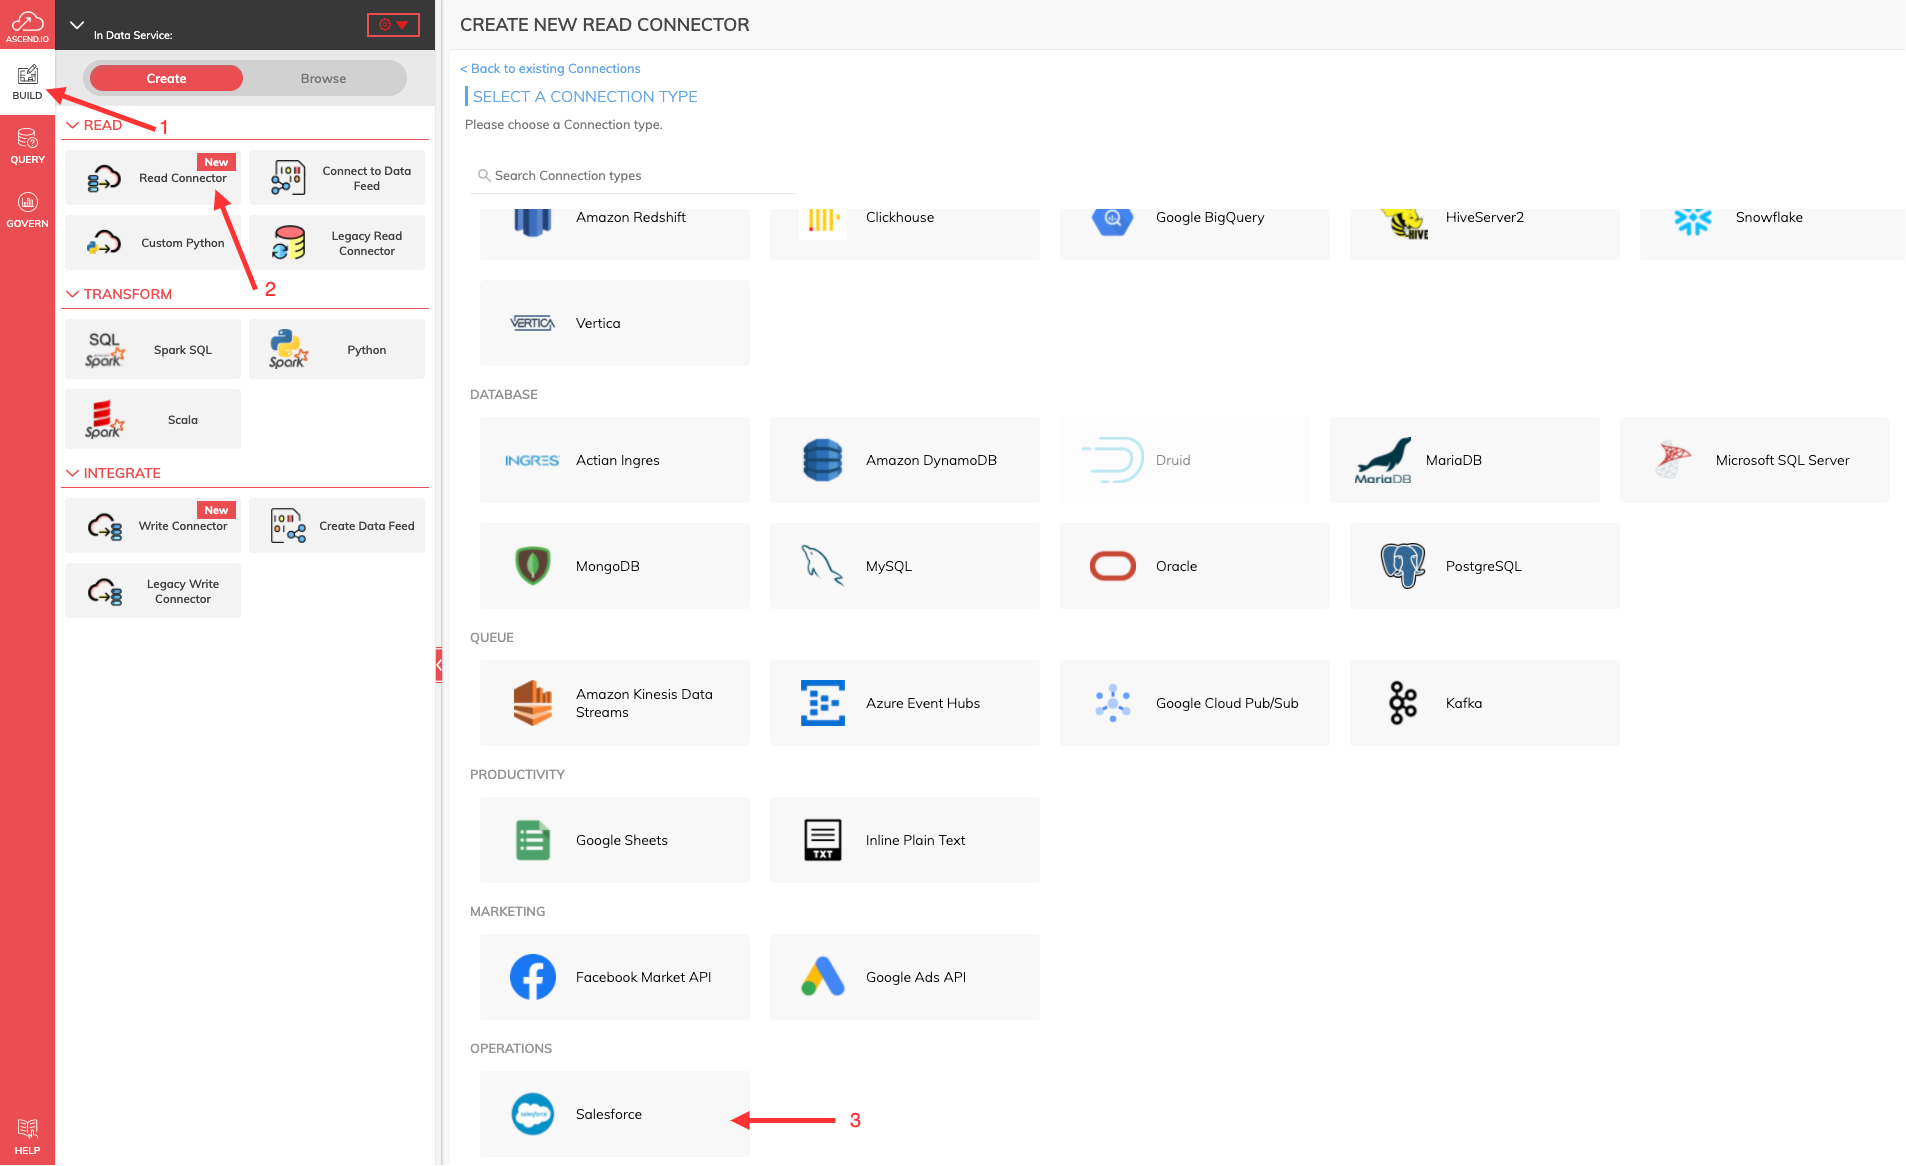
Figure 6
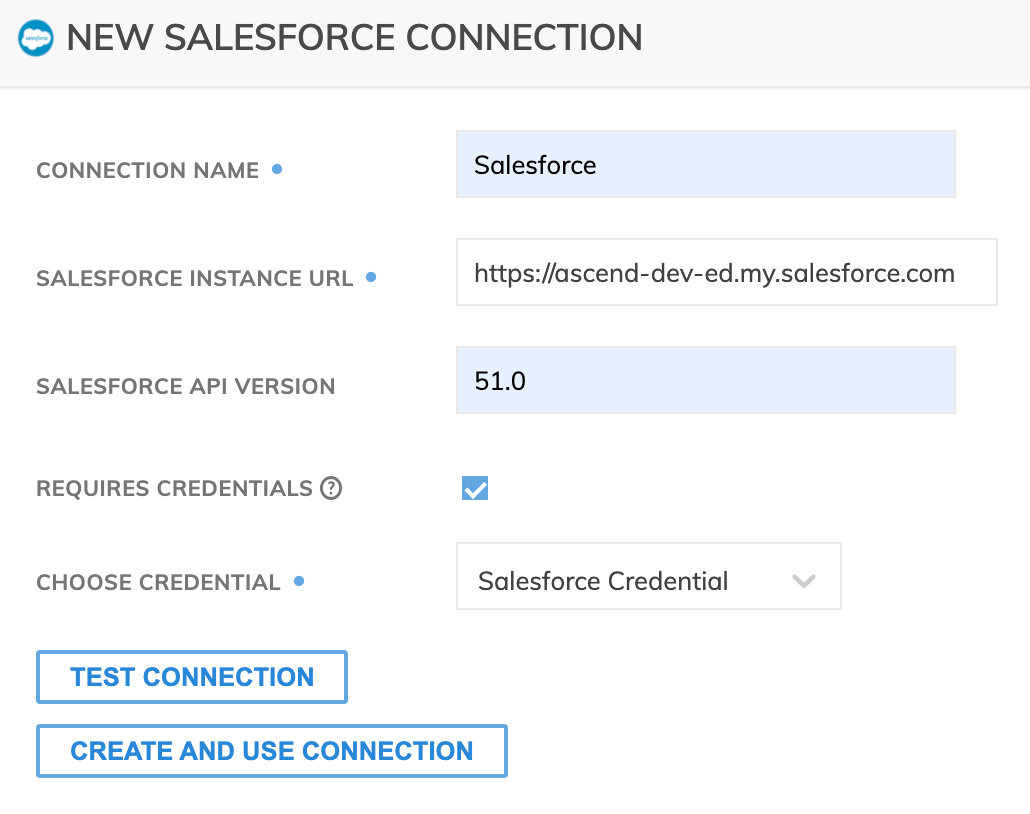
Figure 7
Fields denoted with a blue dot are required
- CONNECTION NAME: The name to identify the connection.
- SALESFORCE INSTANCE URL: Can be found by clicking on the URL while logged into your Salesforce instance.
- The format of the URL will be: https://<your_sf_instance_name>.my.salesforce.com. In the screenshot above, we are using the Salesforce instance named "ascend-dev-ed".
- SALESFORCE API VERSION (optional) : Salesforce API version used to execute REST calls.
- To find the API version, visit this Salesforce Help Article, which recommends going to Setup > Search for "API" > Generate Enterprise WSDL > Click "Generate" button. Generate the Enterprise WSDL file, and look at the comments at the top of the file to get the API version (it will be a version number, e.g. 52.0).
- REQUIRES CREDENTIALS:
- CHOOSE CREDENTIALS: Choose from an existing credential or create new credential for connecting to Salesforce if the Required Credentials checkbox is selected. When creating a new connection that requires credentials, access the drop down to select an existing credential or a new credential. The credentials used to access Salesforce will require the API Enabled checkbox to be selected in the accounts administrative privileges.
Creating a New Credential
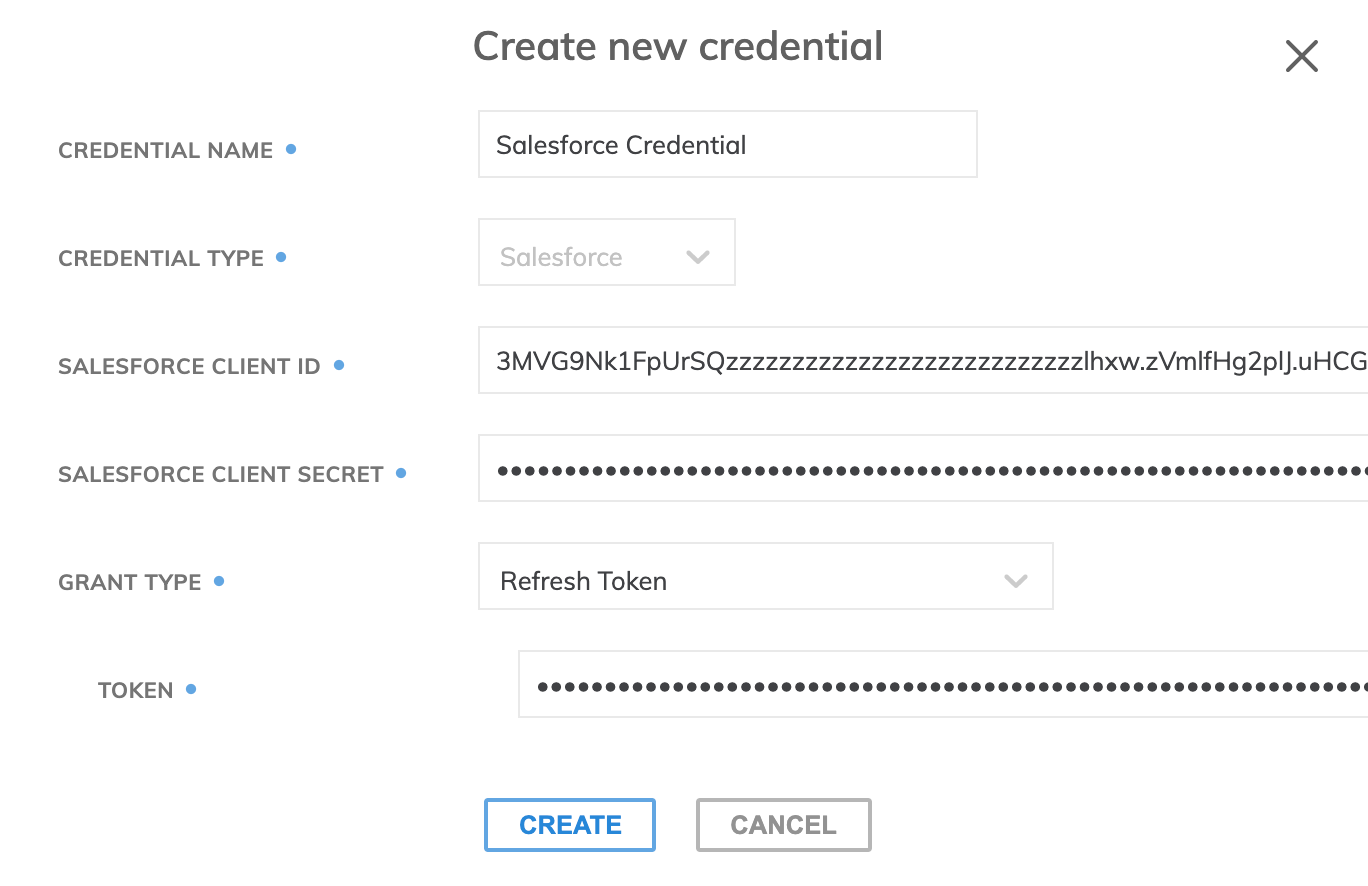
Figure 8
- CREDENTIAL NAME: The name to identify the credential.
- CREDENTIAL TYPE: Salesforce.
- SALESFORCE CLIENT ID: Consumer Key provided by Salesforce in the API (Enable OAuth Settings) section of the Connected App page.
- SALESFORCE CLIENT SECRET: Consumer Secret provided by Salesforce in the API (Enable OAuth Settings) section of the Connected App page.
- GRANT TYPE: Select from Authorization Code, Refresh Token, or Password. If Authorization Code or Refresh Token are selected the authorization code or refresh token will also be required. In the case that Password is selected as the Grant Type, a password is required and a security token is optional.
Updated 8 months ago