Snowflake Write Connector
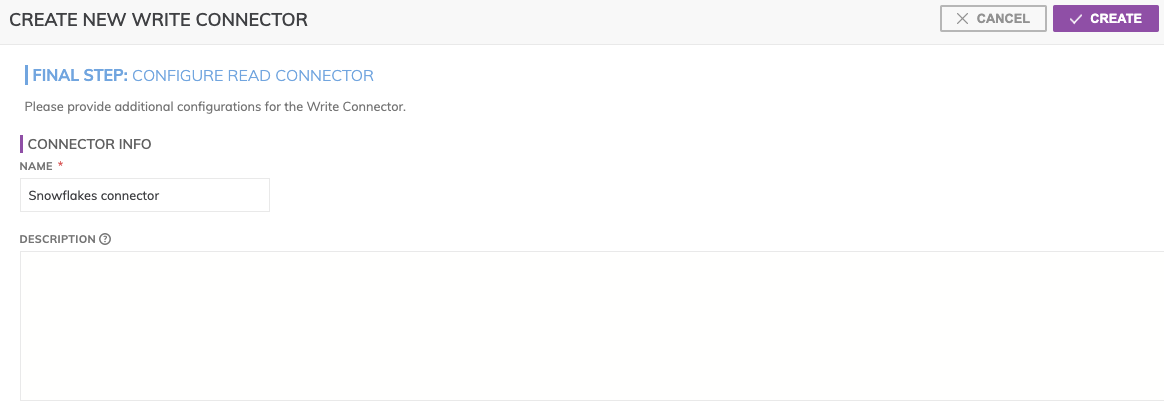
Create New Write Connector

Figure 1
In Figure 1 above:
CONNECTOR INFO
- Name (required): The name to identify this connector with.
- Description (optional): Description of what data this connector will write.
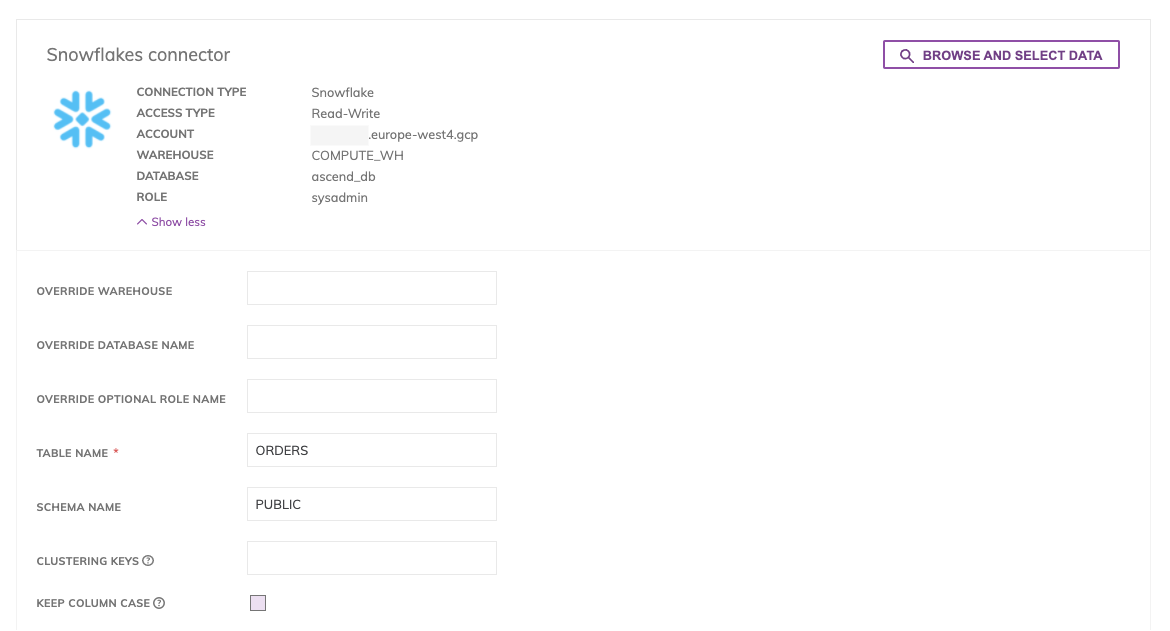
Connector Configuration

Figure 2
You can either manually provide Table Name(required), which is the table are writing or click on Browse and Select Data: this button allows to explore resource and locate the destination table. Select the destination table you want to write and press Select. Note, choosing an existing table will overwrite its contents with the Ascend data set.
- Override Warehouse
- Override Database Name
- Override Optional Role Name
- Table Name (required): table destination you will write
- Schema Name: table schema
- Clustering Key: comma separated clustering keys
- Keep Column Case: check it to not shifting the letters in column names to uppercase
Write Strategy
By default, Ascend writes data incrementally (by partition) to Snowflake by keeping track of the Ascend partitions in the Snowflake table. Ascend does this by maintaining an ASCEND__PARTITION_ID column on the Snowflake table which stores the Partition ID for each record. This way, Ascend can compare the partitions it has internally with the partitions already in Snowflake to determine which partitions are new or updated, and thus need to be written. Ascend will also delete partitions in Snowflake that no longer exist within Ascend.
In order to find how many Ascend partitions were written out to Snowflake, go to the Partitions Tab in your Snowflake Write Connector, and, in the Logs column, click on VIEW. This will take you to the Spark logs for the write job. Hit Ctrl + F to search the page, and search for ‘partitions to write’. You will see a log line similar to ‘partitions to write: 1/3’. This means that, out of a total of 3 upstream Ascend partitions, only 1 is either new or has been updated, and therefore needs to be written out to snowflake.
Updated 7 months ago